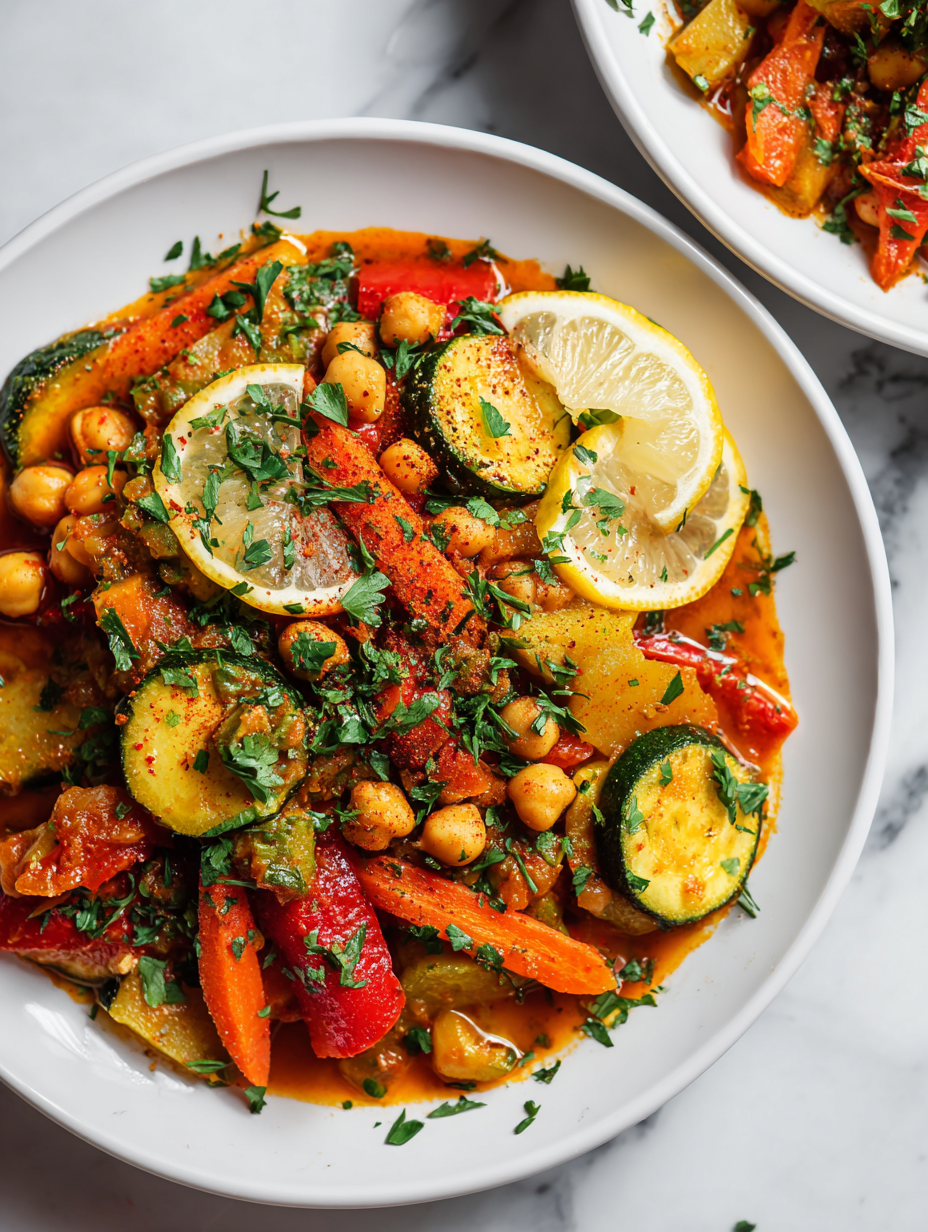
Blog

  • Eyeball Meatballs: A Curious Twist on a Classic Comfort Food

    Eyeball Meatballs: A Curious Twist on a Classic Comfort Food

    Eyeball meatballs are a playful, slightly macabre twist on a familiar dish. They’re perfect for Halloween parties or whenever you want to surprise guests with something a little bizarre but totally tasty. The secret lies in the texture and a crispy exterior that encases a juicy, flavorful interior.
    This recipe isn’t about perfection—it’s about embracing the odd, the imperfect, and the fun of cooking with a little chaos. It’s a reminder that sometimes, the weirdest ideas turn into the best stories around the table.

    Why do I keep making these?

    They’re weird, unexpected, and oddly satisfying. Plus, they make me smile every time I see their quirky little shapes on the plate. It’s a reminder that cooking doesn’t always have to be perfect—sometimes, it’s about the fun and surprise at the table.

    What’s in these eyeball beauties?

    • Ground meat: I opt for beef or pork, but turkey works. Juicy, with enough fat to stay tender.
    • Onion & garlic: Adds flavor and moisture. The smell of sizzling garlic is my favorite.
    • Soy sauce: Salty and umami-rich, it deepens the flavor, but skip if avoiding soy or gluten.
    • Breadcrumbs: Helps hold everything together, makes a juicy bite. Use gluten-free if needed.
    • Egg: Acts as a binder, keeps the shape intact. No substitute, really.
    • Herbs & spices: Parsley, pepper, maybe a pinch of smoked paprika—adds complexity.
    • Oil for searing: A high smoke point oil like canola or vegetable. The sizzle is satisfying.

    Tools of the trade for eyeball meatballs

    • Mixing bowl: Combine ingredients evenly without mess.
    • Skillet or frying pan: Sear the meatballs for a crispy crust.
    • Oven: Finish cooking evenly and thoroughly.
    • Meatball scoop or spoon: Shape uniform-sized meatballs easily.
    • Thermometer: Check internal temperature for safe cooking.

    Step-by-step guide to crafting eyeball meatballs

    Step 1: Gather your ingredients and tools. Preheat your oven to 180°C (350°F).

    Step 2: Mix the ground meat with finely chopped onions, garlic, and a splash of soy sauce for umami depth.

    Step 3: Shape the mixture into small balls, roughly the size of a golf ball.

    Step 4: In a hot skillet, sear the meatballs until they develop a deep, golden crust, about 3-4 minutes per side.

    Step 5: Transfer the browned meatballs to a baking dish and finish cooking in the oven for 15 minutes.

    Step 6: While they bake, prepare a simple tomato sauce or gravy to serve on the side.

    Step 7: Once cooked through (internal temp about 70°C/160°F), let them rest for 5 minutes before serving.

    Cooking checkpoints & tips

    • Ensure the meat mixture is well combined but not overworked, or the meatballs will be tough.
    • The oil should shimmer before adding the meatballs; if it smokes, lower the heat.
    • Crust color is your friend—aim for a deep golden hue for flavor and texture.
    • Use a thermometer to check the internal temperature; 70°C (160°F) is perfectly cooked.

    Common mistakes & how to fix them

    • Meatballs are too loose.? Use too much liquid, meatballs fall apart. Fix: Add more breadcrumbs or oats.
    • Uneven browning.? Overcrowding the pan. Fix: Cook in batches for even searing.
    • Inconsistent doneness.? Overbaking or underbaking. Fix: Use a thermometer to ensure proper internal temp.
    • Lack of crust and flavor.? Not searing long enough. Fix: Wait for deep golden crust before transferring.

    Eyeball Meatballs

    Eyeball meatballs are a playful twist on traditional meatballs, featuring a crispy exterior that encases a juicy, flavorful interior. Made with ground meat, onions, garlic, and herbs, they are seared to develop a golden crust and finished in the oven for even cooking. Their quirky appearance makes them perfect for Halloween parties or fun gatherings, with a satisfying texture that’s both crispy and tender.
    Prep Time 20 minutes
    Cook Time 20 minutes
    Total Time 40 minutes
    Servings: 4
    Course: Main Course
    Cuisine: American
    Calories: 320

    Ingredients
      

    • 1 ½ pounds ground meat (beef, pork, or turkey) juicy and slightly fatty for tenderness
    • 1/2 cup finely chopped onion adds moisture and flavor
    • 3 cloves garlic, minced for aromatic depth
    • 2 tablespoons soy sauce adds umami and saltiness
    • 1/2 cup breadcrumbs helps hold the meatballs together
    • 1 large egg binder for the mixture
    • 1 teaspoon parsley, chopped adds freshness
    • 1/2 teaspoon black pepper for seasoning
    • 1/4 teaspoon smoked paprika for a hint of smokiness
    • oil for frying high smoke point oil (canola or vegetable) for searing

    Equipment

    • Mixing bowl
    • Skillet or frying pan
    • Oven
    • Meatball scoop or spoon
    • Thermometer

    Method
     

    1. Preheat your oven to 180°C (350°F) and gather all your ingredients and tools. In a large mixing bowl, combine the ground meat, chopped onion, minced garlic, soy sauce, breadcrumbs, egg, parsley, black pepper, and smoked paprika. Mix everything thoroughly until well incorporated but avoid overmixing to keep the meat tender.
    2. Using a meatball scoop or spoon, shape the mixture into small, uniform balls roughly the size of a golf ball. Place them on a tray or plate, ready for searing.
    3. Heat a skillet over medium-high heat until the oil shimmers and starts to smoke slightly. Carefully add the meatballs to the pan, ensuring not to overcrowd, and sauté them for about 3-4 minutes per side until they develop a deep, golden brown crust and become crispy.
    4. Transfer the seared meatballs to a baking dish and place in the preheated oven. Bake for 15 minutes, or until the internal temperature reaches about 70°C (160°F) and they are cooked through.
    5. While the meatballs finish baking, prepare a simple tomato sauce or gravy to serve on the side. This adds moisture and flavor contrast.
    6. Once cooked, remove the meatballs from the oven and let them rest for about 5 minutes. They should be juicy inside with a crispy exterior, resembling quirky eyeballs ready to serve.

    Notes

    Ensure the meat mixture is not overworked to keep the meatballs tender. Use a thermometer to confirm they reach the safe internal temperature. For a fun presentation, you can add small edible eyes or garnish to enhance the eyeball effect.
    These eyeball meatballs are more than just a conversation starter. They remind me of childhood experiments and the joy of turning the unusual into something delicious. Remember, the key is in the searing—those crispy edges make all the difference. Feel free to tweak the seasonings or serve them over a bed of greens or noodles. The only rule is to have fun with it and enjoy every bite.

  • Pumpkin Mac and Cheese: A Cozy Fall Twist with a Secret Ingredient

    Pumpkin Mac and Cheese: A Cozy Fall Twist with a Secret Ingredient

    Pumpkin in mac and cheese feels like a cozy secret, adding a subtly sweet, earthy depth that’s perfect for fall. It’s a way to sneak in some veggies without losing the comfort of melted cheese. Plus, roasting pumpkin beforehand gives a smoky undertone that lifts the whole dish.
    This recipe started as a quick fix but grew into a seasonal favorite. It’s forgiving, adaptable, and just the right amount of indulgent. Every spoonful feels like a small celebration of autumn’s flavors.

    Why I keep coming back to this recipe

    It’s the kind of dish that feels like a hug—familiar, warm, with a seasonal twist. The pumpkin adds a subtle richness that keeps it from feeling heavy, even after seconds. Plus, it’s forgiving enough to experiment with—extra spice, different cheeses—making each batch a little personal. It’s comfort food that feels like a small victory every time I make it.

    Breaking down the key ingredients

    • Pumpkin puree: Rich and velvety, it adds sweetness and color. Use canned or roasted homemade pumpkin.
    • Cheddar cheese: Sharp and tangy, it melts into a smooth, gooey sauce—swap for Gruyère for a nuttier flavor.
    • Pasta: A sturdy shape like shells or cavatappi holds the sauce well. Whole wheat adds a nutty note.
    • Milk and cream: Create a luscious base—skim milk works, but full-fat gives better richness.
    • Breadcrumbs: Optional topping for crunch—use panko for extra crispiness.
    • Spices (nutmeg, pepper): A pinch of nutmeg echoes fall’s warmth and enhances the cheese.
    • Onion: Sweated until sweet, it deepens the flavor—can skip if you’re in a rush.

    Tools and equipment you’ll want nearby

    • Large pot: Boil the pasta to just the right al dente.
    • Saucepan: Make the cheese and pumpkin sauce.
    • Whisk: Blend ingredients smoothly without lumps.
    • Baking dish: Bake the assembled mac and cheese to bubbly perfection.
    • Measuring cups and spoons: Ensure accurate ingredient quantities.

    Step-by-step to a cozy pumpkin mac and cheese

    Step 1: Preheat your oven to 180°C (350°F).

    Step 2: Cook 250g (9 oz) of pasta until just al dente, about 8 minutes. Drain and set aside.

    Step 3: In a large pan, melt 2 tbsp butter over medium heat. Add 1 cup chopped onion, sauté until translucent, about 5 minutes.

    Step 4: Stir in 1 cup pumpkin puree and cook for 2 minutes, until fragrant and slightly caramelized.

    Step 5: In a separate bowl, whisk together 1 cup milk, 1 cup heavy cream, and 1 tsp Dijon mustard.

    Step 6: Gradually add the milk mixture to the pumpkin in the pan, stirring constantly to prevent curdling.

    Step 7: Add 1 ½ cups shredded cheese (cheddar and Gruyère blend). Stir until melted and smooth.

    Step 8: Mix the cooked pasta into the cheese sauce. Season with salt, pepper, and a pinch of nutmeg.

    Step 9: Transfer everything to a greased baking dish. Top with a handful of extra cheese and breadcrumbs if desired.

    Step 10: Bake for 20-25 minutes until bubbly and golden on top.

    Cooking checkpoints and tips to get it just right

    • Cheese sauce should be smooth, not grainy—keep stirring over low heat.
    • Pasta must be just al dente—overcooking makes it mushy after baking.
    • Look for bubbling edges when baking—signs it’s hot and ready.
    • Top should be golden and crispy—don’t skimp on the cheese or breadcrumbs.

    Common pitfalls and how to fix them

    • Cheese sauce curdles or separates.? If cheese sauce breaks, lower the heat and whisk in a splash of milk to bring it back together.
    • Pasta becomes too soft.? If pasta is overcooked, it turns mushy—next time, reduce boiling time by a minute.
    • The topping remains pale or soggy.? If the top isn’t golden, broil for 2-3 minutes—watch closely to prevent burning.
    • The sauce is gloopy and stiff.? If sauce is too thick, stir in a little more warm milk until it loosens.

    Pumpkin Mac and Cheese

    This pumpkin mac and cheese combines creamy, cheesy sauce with a hint of roasted pumpkin for a seasonal twist. The dish is assembled with al dente pasta coated in a smooth pumpkin and cheese mixture, then baked until bubbling and golden. The final result is a comforting, velvety casserole with a subtle sweetness and a smoky undertone, perfect for fall.
    Prep Time 10 minutes
    Cook Time 30 minutes
    Total Time 40 minutes
    Servings: 4
    Course: Main Course
    Cuisine: American
    Calories: 520

    Ingredients
      

    • 250 g pasta shells or cavatappi sturdy pasta shape
    • 1 cup pumpkin puree canned or roasted homemade
    • 1 cup shredded cheddar cheese sharp and tangy
    • 0.5 cup shredded Gruyère cheese nutty flavor, optional
    • 1 cup milk whole or skim
    • 1 cup heavy cream
    • 2 tbsp butter
    • 1 cup chopped onion sweated until translucent
    • 1 tsp nutmeg ground
    • to taste salt and pepper
    • 0.5 cup breadcrumbs panko for extra crunch

    Equipment

    • Large pot
    • Saucepan
    • Whisk
    • Baking Dish
    • Measuring cups and spoons

    Method
     

    1. Preheat your oven to 180°C (350°F) and set a large pot of salted water to boil.
    2. Add the pasta to the boiling water and cook until just al dente, about 8 minutes. Drain and set aside.
    3. In a large saucepan, melt the butter over medium heat. Add the chopped onion and sauté until it becomes translucent and fragrant, about 5 minutes.
    4. Stir in the pumpkin puree and cook for another 2 minutes, allowing the flavors to meld and the mixture to smell warm and slightly caramelized.
    5. In a bowl, whisk together the milk, heavy cream, and a pinch of salt, pepper, and nutmeg.
    6. Gradually pour the milk mixture into the saucepan with the pumpkin, stirring constantly to keep the sauce smooth and prevent curdling.
    7. Stir in the shredded cheddar and Gruyère cheeses until fully melted and the sauce is silky and creamy.
    8. Mix the cooked pasta into the cheese and pumpkin sauce, ensuring each piece is coated evenly. Season with salt, pepper, and a pinch of nutmeg.
    9. Transfer the mixture to a greased baking dish, spreading it out evenly. Sprinkle breadcrumbs and extra cheese over the top for a crispy finish.
    10. Bake for 20-25 minutes until bubbly around the edges and the top is golden brown and crispy.
    11. Remove from the oven and let it sit for a few minutes. Serve hot, with a sprinkle of extra cheese or herbs if desired.

    Notes

    For an extra smoky flavor, roast the pumpkin beforehand until slightly charred before pureeing. Adjust the spice levels to suit your taste, adding a pinch of cayenne or paprika for heat. Using different cheeses like fontina or mozzarella can create varied flavor profiles.
    This pumpkin mac and cheese is a warm embrace on a chilly day. It’s forgiving enough to tweak—extra spices, more cheese, or a crispy topping. The pumpkin’s sweetness balances the sharp cheese, creating a dish that’s both familiar and unexpectedly vibrant. Dig in and make it your own, maybe adding a dash of smoked paprika or a handful of toasted nuts.

  • Spooky Shepherd’s Pie: A Haunted Twist on Comfort Food

    Spooky Shepherd’s Pie: A Haunted Twist on Comfort Food

    Shepherd’s pie is usually cozy, hearty, familiar. But I like to twist it into something a bit more mischievous—like a dish that whispers ghost stories with every bite. It’s about using what’s in the fridge, but giving it a spooky makeover that sparks a little joy and chaos.

    Why This Haunted Dish Gets My Return Visit

    The blend of familiar comfort and twisted creativity keeps me coming back. It’s perfect for Halloween, or just a rainy night when I need a dish that’s as satisfying as a ghost story. The leftovers are even better—like a secret recipe passed down through haunted kitchens.

    Mystery Ingredients Revealed

    • Leftover roast meat: The soul of this dish—use what you have, but aim for tender, shredded bits.
    • Mashed potatoes: Creamy and fluffy, or lumpy if you prefer rustic. Use leftover mash or make fresh.
    • Frozen peas and carrots: Adds sweetness and color—stay frozen for convenience and freshness.
    • Onions and garlic: Builds the foundation—bring out a fragrant, ghostly aroma.
    • Red wine or broth: Deepens the flavor—use what’s in your pantry, even a splash of vinegar works.
    • Tomato paste: Rich and concentrated—adds a smoky, umami punch without overpowering.
    • Spices (paprika, thyme, black pepper): Season to taste—don’t be shy, they add layers of haunting flavor.

    Tools for Your Haunted Kitchen

    • Large skillet: To sauté the vegetables and meat, creating a rich base.
    • Mixing spoon: For stirring and combining ingredients.
    • Baking dish: To assemble and bake the shepherd’s pie.
    • Masher or fork: To mash the potatoes smoothly or lumpy, as desired.
    • Oven: To finish the dish with a crispy, golden top.

    Crafting the Spooky Shepherd’s Pie

    Step 1: Preheat your oven to 200°C (390°F).

    Step 2: Chop the leftover roast beef or lamb into small, ragged chunks, like tiny spooky stones.

    Step 3: In a pan, sauté some diced onions and garlic until translucent—smells like ghostly whispers.

    Step 4: Add the meat, a splash of red wine, and a dollop of tomato paste. Cook until the mixture is thick and oozy.

    Step 5: Stir in frozen peas and carrots, letting them soften and release their sweet, earthy aroma.

    Step 6: Pour the meat mixture into a baking dish, spreading it out evenly.

    Step 7: Scoop mashed potatoes on top, creating a lumpy, uneven surface—like a graveyard of comfort.

    Step 8: Bake for 25-30 minutes until the top is golden-brown and crackly, with some edges curling up like haunted wisps.

    Keep an Eye Out for These Spooky Signs

    • Meat is browned and smells rich, not burnt.
    • Vegetables are tender but not mushy.
    • Top is golden and slightly crackly, not soggy or pale.
    • Center of pie reads 75°C (165°F) when tested with a probe.

    Avoid These Haunted Kitchen Mistakes

    • Too runny filling.? Add too much liquid? Simmer it down longer or thicken with a touch of flour or cornstarch.
    • Soggy potato topping.? Potatoes not bubbly and crackly? Broil for 2-3 minutes, watching closely.
    • Burnt top.? Over-browning? Cover with foil for the last 10 minutes.
    • Uneven cooking.? Forgot to preheat? It’s okay, just give it a few extra minutes to heat evenly.

    Spooky Shepherd’s Pie

    This twist on classic shepherd’s pie combines tender shredded leftover meat with a hearty vegetable and gravy base, topped with a rustic mashed potato layer. Baked until golden and crackly, it creates a cozy, comforting dish with a haunted twist, perfect for Halloween or rainy nights. Its final appearance is a bubbling, golden crust with an invitingly uneven, graveyard-like surface.
    Prep Time 20 minutes
    Cook Time 30 minutes
    Total Time 50 minutes
    Servings: 4
    Course: Main Course
    Cuisine: comfort food
    Calories: 450

    Ingredients
      

    • 2 cups leftover roast meat (beef or lamb) shredded into small chunks
    • 3 cups mashed potatoes prepared, creamy or rustic
    • 1 cup frozen peas and carrots stay frozen until use
    • 1 medium onion diced
    • 2 cloves garlic minced
    • 1/2 cup red wine or broth for flavor
    • 2 tablespoons tomato paste adds smoky umami
    • 1 teaspoon paprika for depth of flavor
    • 1/2 teaspoon thyme dried or fresh
    • to taste black pepper

    Equipment

    • Large Skillet
    • Mixing spoon
    • Baking Dish
    • masher or fork
    • Oven

    Method
     

    1. Preheat your oven to 200°C (390°F) to get ready for baking later.
    2. Chop or shred the leftover roast meat into small, ragged chunks, mimicking tiny spooky stones to add texture and visual interest.
    3. In a large skillet, sauté diced onions and minced garlic until they turn translucent and fragrant, filling your kitchen with a ghostly aroma.
    4. Add the shredded meat to the skillet, then pour in red wine or broth and stir in tomato paste, paprika, thyme, and black pepper. Cook until the mixture thickens and becomes oozy, about 5 minutes.
    5. Stir in the frozen peas and carrots, letting them soften and release their sweet, earthy aroma into the rich gravy.
    6. Pour the meat and vegetable mixture into a baking dish, spreading it out evenly like a secret lair of flavors.
    7. Scoop the mashed potatoes on top, spreading them unevenly to create a lumpy, graveyard-like surface that looks spooky and rustic.
    8. Bake the assembled shepherd’s pie in the preheated oven for 25-30 minutes, until the top turns golden brown and crackly, with some edges curling up like haunted wisps.
    9. Remove from oven and let sit for a few minutes. The bubbling, crackly crust signals that the dish is ready to serve and enjoy.
    This dish isn’t just about leftovers dressed up for Halloween. It’s a reminder that comfort food can be a little eerie, a little fun, and totally satisfying. Feel free to add extra spices, a dash of smoky paprika, or even some black sesame seeds for a haunted look. The key is to embrace the chaos, let your instincts guide you, and enjoy every spooky bite.

  • Halloween Brownies with a Spooky Twist: A Dark Chocolate Adventure

    Halloween Brownies with a Spooky Twist: A Dark Chocolate Adventure

    Halloween isn’t just about costumes and trick-or-treating; it’s about embracing the dark, the spooky, and the sweet. These brownies are a nod to that, with a deep chocolate flavor and a hint of mystery in every bite. They’re simple enough to whip up last minute but impressive enough to make your night feel special.

    Why These Brownies Keep Coming Back in My Kitchen

    They’re imperfect and cozy, with a richness that feels indulgent but not overwhelming. The way the chocolate crackles at the edges, the smell of warm cocoa filling the house—those moments make me want to bake them again. Plus, they’re endlessly customizable—add a swirl of peanut butter, sprinkle with candy eyes, or dust with ghostly powdered sugar.

    Dark, Delicious, and a Little Mysterious: Ingredients for Halloween Brownies

    • Dark chocolate: Deep, smoky flavor that melts into a velvety richness. Use good-quality chocolate for best results.
    • Butter: Adds moisture and a touch of richness. Unsalted is best, but salted works if you adjust salt.
    • Eggs: Bind the batter; eggs give structure and a tender crumb.
    • Sugar: Sweetens and balances the bitterness of the dark chocolate. Brown sugar will add a caramel note.
    • Flour: Provides structure. All-purpose works fine, but cake flour makes it lighter.
    • Vanilla extract: A splash enhances the chocolate flavor with a hint of warmth.
    • Salt: A pinch heightens all the flavors and balances the sweetness.

    Tools of the Dark Chocolate Trade

    • Double boiler or microwave: Melting chocolate gently without burning.
    • 20x20cm (8×8 inch) baking pan: Holding the brownie batter for baking.
    • Parchment paper: Easing removal and cleanup.
    • Spatula: Smoothing the batter and spreading evenly.
    • Wire rack: Cooling brownies evenly.

    Step-by-Step Guide to Crafting Your Halloween Brownies

    Step 1: Preheat your oven to 175°C (350°F). Grease a 20x20cm (8×8 inch) baking pan and line it with parchment paper.

    Step 2: Melt 200g of dark chocolate and 150g of butter together in a double boiler or microwave in short bursts, stirring until smooth. Let cool slightly.

    Step 3: In a large bowl, whisk together 2 eggs, 150g sugar, and a teaspoon of vanilla extract until fluffy.

    Step 4: Fold the melted chocolate mixture into the egg mixture, then sift in 100g of flour, a pinch of salt, and a teaspoon of baking powder. Mix just until combined.

    Step 5: Pour the batter into your prepared pan, smoothing the top with a spatula.

    Step 6: Bake for 20–25 minutes, until the edges are set but the center still jiggles slightly. A toothpick inserted should come out with moist crumbs.

    Step 7: Let the brownies cool in the pan for 15 minutes, then transfer to a wire rack to cool completely before decorating.

    Cooking Checkpoints and Tips for Perfect Halloween Brownies

    • Chocolate should be glossy and smooth after melting.
    • Batter should be just combined, not overmixed, to keep brownies tender.
    • Edges should be slightly darker and firm to the touch when done.

    Common Halloween Brownie Mishaps and How to Fix Them

    • Chocolate overheated or burnt.? Melted chocolate seized or burned? Cool it slightly before mixing to prevent seizing.
    • Batter is too dense or stiff.? Batter too thick? Add a splash of warm milk to loosen it.
    • Overbaked or oven too hot.? Brownies cracked on top? Cover with foil and lower oven temp slightly.
    • Overcooking or oven too hot.? Edges burnt or overly dark? Reduce baking time or lower oven temperature.

    Halloween Dark Chocolate Brownies

    These rich, fudgy brownies feature a deep chocolate flavor with a crackly top, offering a cozy, imperfect look perfect for Halloween. Made with dark chocolate, butter, and eggs, they bake to a tender, slightly chewy texture with edges that crackle and caramelize beautifully. Customizable with fun decorations to add a spooky touch.
    Prep Time 15 minutes
    Cook Time 25 minutes
    Total Time 40 minutes
    Servings: 9
    Course: Main Course
    Cuisine: American
    Calories: 220

    Ingredients
      

    • 200 g dark chocolate good quality for rich flavor
    • 150 g unsalted butter
    • 2 eggs at room temperature
    • 150 g granulated sugar
    • 1 tsp vanilla extract
    • 100 g all-purpose flour
    • pinch salt

    Equipment

    • Double boiler or microwave
    • 20x20cm (8×8 inch) baking pan
    • Parchment paper
    • Spatula
    • Wire rack

    Method
     

    1. Preheat your oven to 175°C (350°F) and line the baking pan with parchment paper, setting it aside.
    2. Melt the dark chocolate and butter together using a double boiler or microwave, stirring until smooth and glossy. Let the mixture cool slightly to prevent cooking the eggs.
    3. In a large bowl, whisk the eggs, sugar, and vanilla extract until the mixture becomes light, fluffy, and slightly pale, about 2-3 minutes.
    4. Gently fold the cooled chocolate-butter mixture into the egg mixture, combining until smooth and integrated.
    5. Sift the flour and salt into the batter, then fold gently until just combined. Do not overmix to keep the brownies tender.
    6. Pour the batter into your prepared baking pan, spreading it evenly with a spatula to fill all corners.
    7. Bake in the preheated oven for 20–25 minutes, until the edges are set and slightly darker, and a toothpick inserted into the center comes out with moist crumbs.
    8. Remove the brownies from the oven and let them cool in the pan for about 15 minutes, allowing the edges to firm up and crackle.
    9. Transfer the brownies to a wire rack to cool completely. Once cooled, cut into squares and decorate as desired for a spooky Halloween effect.
    10. Enjoy your dark, fudgy Halloween brownies, perfect for sharing and decorating with fun, spooky toppings!

    Notes

    For extra spooky flair, add candy eyes or dust with powdered sugar before serving.
    These brownies aren’t just a dessert; they’re a little ritual for Halloween night. As you cut into them, the rich, fudgy crumb reveals a surprise—maybe a splash of orange icing or a dash of edible glitter. They’re messy, fun, and perfect for a spooky gathering or just a quiet night of indulgence. Have fun customizing them—think dark chocolate ganache, creepy eyes, or a dusting of powdered sugar for ghostly effects.

  • Mummy Hot Dogs: A Nostalgic Snack with a Twist

    Mummy Hot Dogs: A Nostalgic Snack with a Twist

    Mummy hot dogs are a playful take on a classic snack, perfect for Halloween or any fun gathering. I love how the flaky pastry transforms an ordinary hot dog into something spooky and delightful. It’s a simple recipe, but the visual impact makes it feel special.

    Why I Keep Making Mummy Hot Dogs

    They’re a perfect blend of comfort and chaos, easy to share, and always a hit with kids and adults alike. Plus, they come together quickly, which is crucial on busy nights or when friends drop by unexpectedly.

    Inside the Mummy Hot Dogs: Ingredient Insights

    • Puff pastry: Flaky, buttery, perfect for wrapping around hot dogs. Use frozen and keep cold.
    • Hot dogs: Juicy and plump, they form the core of the mummy. Beef or chicken work well.
    • Ketchup & mustard: Classic condiments, add tang and sweetness. Swap with sriracha for spice.
    • Pickle juice: Brightens the sauce with a zing, but lemon juice can substitute.
    • Egg wash: Helps pastry brown beautifully, mix a beaten egg with a splash of water.
    • Cheese (optional): Adds gooeyness if you want extra indulgence.
    • Sesame seeds (optional): For extra crunch and visual appeal.

    Tools of the Mummy Hot Dogs Trade

    • Baking sheet: To hold the hot dogs while baking evenly.
    • Parchment paper: Prevents sticking and makes cleanup easier.
    • Pastry brush: To seal edges with water for a secure wrap.
    • Sharp knife: To cut pastry into strips smoothly.

    Crafting the Perfect Mummy Hot Dogs

    Step 1: Preheat your oven to 200°C (390°F).

    Step 2: Cut puff pastry into strips about 1 inch wide.

    Step 3: Wrap each hot dog with pastry, sealing the edges with a dab of water.

    Step 4: Place on a baking sheet lined with parchment paper.

    Step 5: Bake for 15-20 minutes until golden and crispy.

    Step 6: Meanwhile, mix ketchup, mustard, and a splash of pickle juice for a tangy dipping sauce.

    Step 7: Once baked, let them rest for 5 minutes before serving.

    Key Tips for Mummy Hot Dogs Success

    • Ensure pastry is cold before wrapping to prevent tearing.
    • Seal edges well to stop filling from escaping during baking.
    • Watch the oven closely after 15 minutes to prevent burning.
    • Check for a deep golden color and crispy texture.

    Common Pitfalls and How to Fix Them

    • Pastry tears while wrapping.? Use cold pastry to prevent tearing.
    • Pastry unravels during baking.? Seal edges thoroughly with water.
    • Pastry burns or underbakes.? Bake at the right temperature and keep an eye on time.
    • Hot dogs are too runny or soggy.? Let hot dogs rest briefly after baking.

    Mummy Hot Dogs

    Mummy hot dogs are a fun, spooky snack featuring juicy hot dogs wrapped in flaky puff pastry, creating a crispy, golden exterior resembling a mummy’s wrappings. The dish is quick to assemble and bakes into an appealing, playful appetizer perfect for Halloween or themed gatherings. The final result is a delightful combination of crunchy pastry and savory hot dog, with a whimsical, mummy-like appearance.
    Prep Time 10 minutes
    Cook Time 20 minutes
    Total Time 30 minutes
    Servings: 4
    Course: Main Course
    Cuisine: American
    Calories: 320

    Ingredients
      

    • 1 package frozen puff pastry keep cold before use
    • 4 hot dogs hot dogs beef or chicken
    • 1 egg egg beaten, for egg wash
    • 1 tablespoon water to mix with egg
    • to taste ketchup for dipping sauce
    • to taste mustard for dipping sauce

    Equipment

    • Baking sheet
    • Parchment paper
    • Pastry brush
    • Sharp Knife

    Method
     

    1. Preheat your oven to 200°C (390°F) and line a baking sheet with parchment paper to prevent sticking.
    2. Thaw the puff pastry just until pliable, then lightly flour a clean surface. Roll it out gently if needed, keeping it cold to prevent tearing.
    3. Using a sharp knife, cut the puff pastry into strips about 1 inch wide, ensuring straight, even cuts for a neat mummy wrap.
    4. Place each hot dog on a work surface and wrap the pastry strips around, overlapping slightly and leaving space at one end for the hot dog to be visible. Seal the edges with a dab of beaten egg if needed.
    5. Arrange the wrapped hot dogs on the prepared baking sheet, spacing them evenly to allow for expansion during baking.
    6. Mix the beaten egg with a splash of water to create an egg wash, then brush it lightly over the pastry to help it turn a beautiful golden brown.
    7. Bake in the preheated oven for 15-20 minutes, or until the pastry is deep golden and crispy, and the hot dogs are heated through.
    8. While baking, prepare a simple dipping sauce by combining ketchup, mustard, and a splash of pickle juice or lemon juice for added zing.
    9. Remove the mummy hot dogs from the oven and let them rest for about 5 minutes; this helps the pastry crisp up further and cool slightly for easier handling.
    10. Serve the hot dogs on a platter with the dipping sauce on the side, and enjoy their crispy, playful appearance and savory flavor.

    Notes

    Ensure the pastry remains cold to prevent tearing. Seal edges thoroughly to prevent filling from escaping. Keep an eye on the baking time to achieve perfect golden crispiness. Let hot dogs rest briefly after baking to avoid sogginess.
    These mummy hot dogs aren’t just a fun twist, but they also bring back childhood memories of school lunches and neighborhood barbecues. The crispy pastry envelops the juicy hot dog, and the savory dip adds a bright contrast. Feel free to personalize with cheese, chili, or even a sprinkle of sesame seeds for an extra crunch. They’re messy, nostalgic, and best enjoyed with friends or family gathered around.

  • Pumpkin Whoopie Pies: A Cozy Fall Treat with a Twist

    Pumpkin Whoopie Pies: A Cozy Fall Treat with a Twist

    Pumpkin whoopie pies are a little twist on the classic sandwich cookie, but with a seasonal flair that makes them feel like a warm hug. The pumpkin adds moisture and a subtle earthiness, balanced by warm spices and a sweet, creamy filling. They’re perfect for chilly mornings or cozy gatherings, where the scent alone sparks a wave of nostalgia.

    Why I Keep Coming Back to This Recipe

    It captures the essence of fall—spicy, sweet, and filling the house with warmth. The process is forgiving, and the results are consistently delightful. Plus, it’s adaptable—perfect for experimenting with flavors or dietary swaps. These pies are my go-to when I want a little comfort or to share something special without fuss.

    What’s Inside: The Soul of Pumpkin Whoopie Pies

    • Canned pumpkin puree: It’s the moist heart of these treats—sweet, velvety, and rich in flavor. Swap for sweet potato puree if you want a different earthiness.
    • Brown sugar: Adds deep molasses notes and moisture. Lighten it with coconut sugar if you prefer a milder sweetness.
    • Warm spices (cinnamon, nutmeg, ginger): The aroma is intoxicating, evoking cozy mornings. Adjust amounts for more punch or subtlety.
    • Cream cheese for filling: Tangy and smooth, it balances the sweetness. Vegan cream cheese can be a good swap here.
    • Butter or vegan margarine: Provides richness and structure. Use coconut oil for a dairy-free version.
    • All-purpose flour: The base that gives structure. Whole wheat works if you want a bit more fiber.
    • Baking soda: Leavens the batter, making the cookies rise just right.

    Tools of the Trade for Pumpkin Whoopie Pies

    • Mixing bowls: For combining wet and dry ingredients.
    • Electric mixer or whisk: To beat the butter and sugar until fluffy.
    • Baking sheets: To hold the cookies while baking.
    • Parchment paper: To prevent sticking and easy cleanup.
    • Cooling rack: To cool the cookies evenly.

    Crafting the Perfect Pumpkin Whoopie Pie

    Step 1: Preheat your oven to 180°C (350°F).

    Step 2: Line two baking sheets with parchment paper.

    Step 3: In a large bowl, whisk together 1 1/2 cups of flour, 1 teaspoon baking soda, and 1/2 teaspoon salt.

    Step 4: In another bowl, beat 1/2 cup unsalted butter with 1 cup brown sugar until creamy.

    Step 5: Add 1 cup canned pumpkin puree, 1 egg, and 1 teaspoon vanilla extract to the butter mixture. Mix well.

    Step 6: Gradually add dry ingredients to wet, mixing just until combined.

    Step 7: Scoop spoonfuls of batter onto baking sheets, spacing them about 2 inches apart.

    Step 8: Bake for 12-15 minutes, until the edges are golden and the tops are just set.

    Step 9: Let the cookies cool on a wire rack for 10 minutes before handling.

    Key Moments to Watch While Baking

    • Cookies should be lightly golden around the edges.
    • The batter should hold its shape but still be soft enough to scoop.
    • Filling should be smooth and creamy, not runny or stiff.
    • Always test the oven temperature with a thermometer for accuracy.

    Common Pitfalls and How to Fix Them

    • Over-mixing the batter, which develops gluten and spreads the cookies.? If cookies are flat, chill the batter for 15 minutes before baking.
    • Using too much flour, which can make cookies dry.? Dough is too sticky? Lightly flour your hands and scoop.
    • Over-softened butter or too much liquid in the filling.? If filling is runny, refrigerate it for 10 minutes before piping.
    • Oven running hot or baking too long.? Cookies crack or burn? Reduce oven temperature by 10°C (20°F).

    Pumpkin Whoopie Pies

    Pumpkin whoopie pies are soft, moist sandwich cookies filled with a creamy tangy frosting. The batter combines pumpkin puree, warm spices, and flour, baked until golden, then assembled with a luscious cheese filling. Their cozy appearance and spiced aroma make them perfect for fall gatherings and chilly mornings.
    Prep Time 20 minutes
    Cook Time 15 minutes
    Total Time 35 minutes
    Servings: 12
    Course: Main Course
    Cuisine: American
    Calories: 250

    Ingredients
      

    • 1 1/2 cups all-purpose flour or whole wheat flour for more fiber
    • 1 teaspoon baking soda
    • 1/2 teaspoon salt
    • 1/2 cup unsalted butter softened
    • 1 cup brown sugar light or dark
    • 1 cup canned pumpkin puree fresh or canned
    • 1 egg large egg
    • 1 teaspoon vanilla extract
    • 8 oz cream cheese softened
    • 1/2 cup butter or vegan margarine softened
    • 3-4 cups powdered sugar for frosting

    Equipment

    • Mixing bowls
    • Electric mixer or whisk
    • Baking sheets
    • Parchment paper
    • Cooling rack

    Method
     

    1. Preheat your oven to 180°C (350°F) and line two baking sheets with parchment paper.
    2. In a large bowl, whisk together the flour, baking soda, and salt until evenly combined. Set aside.
    3. In another bowl, beat the softened butter and brown sugar with an electric mixer until the mixture is light, fluffy, and fragrant, about 2-3 minutes.
    4. Add the pumpkin puree, egg, and vanilla to the butter mixture, beating until smooth and well combined. The batter will be thick and slightly sticky.
    5. Gradually fold the dry ingredients into the wet mixture using a spatula or mixer on low speed, just until everything is combined and the batter feels soft but scoopable.
    6. Scoop tablespoon-sized dollops of batter onto the prepared baking sheets, spacing them about 2 inches apart. Slightly flatten each mound with the back of a spoon.
    7. Bake in the preheated oven for 12-15 minutes, or until the edges are lightly golden and the tops are set but still soft.
    8. Remove the cookies from the oven and let them cool on the baking sheets for 10 minutes before transferring to a wire rack to cool completely.
    9. Meanwhile, prepare the filling by beating the softened cream cheese, butter, and powdered sugar together until smooth, creamy, and fluffy.
    10. Once the cookies are cooled, spread or pipe the cream cheese filling onto the flat side of one cookie, then top with another cookie to form a sandwich.
    11. Repeat with the remaining cookies and filling. Chill the assembled pies for 30 minutes to set the filling if desired.
    12. Enjoy these cozy, spiced pumpkin treats with a hot beverage or as a festive dessert!

    Notes

    Chilling the assembled pies helps the filling set and makes them easier to handle. Feel free to add a sprinkle of cinnamon or drizzle melted chocolate on top for extra flair.
    These pumpkin whoopie pies are a reminder of fall’s fleeting charm—warm spices, soft cookies, and that comforting pumpkin aroma. They’re not just treats but small moments of nostalgia, perfect for sharing or savoring alone with a good cup of tea. The process is straightforward enough, but the results feel special enough for any occasion. Feel free to tweak the spices or add a splash of bourbon to the filling for a personal touch.

  • Monster Rice Krispie Treats: An Unlikely Crunch Masterpiece

    Monster Rice Krispie Treats: An Unlikely Crunch Masterpiece

    There’s something about making monster Rice Krispie treats that feels like taming a little chaos. It’s not just about the sweet crunch but about embracing the mess and the melt. I love how the marshmallow goo can bubble over, and the smell of butter and sugar fills the kitchen with a nostalgic punch.
    This recipe is about pushing boundaries—adding a little extra salt, tossing in some spicy nuts, or even swirling in a layer of dark chocolate. It’s a treat that’s part comfort, part rebellion, and totally addictive.

    Why I Keep Coming Back to These Monster Treats

    They’re imperfectly perfect—crunchy edges, sticky insides, and a nostalgic rush every time. Adding a twist keeps it fresh and exciting, especially during seasons of chaos or comfort. They remind me that sometimes, the messiest recipes turn out to be the most rewarding. That irresistible aroma and the first crack of the crisp edges always pull me back.

    Inside the Monster: Key Ingredients and Their Wild Roles

    • Marshmallows: They melt into an gooey, sweet binder that’s the soul of these treats. Use good quality for that perfect stretch.
    • Butter: Creates richness and helps everything meld together. Skip or swap with margarine if you’re feeling frugal.
    • Crispy rice cereal: It’s the backbone, giving that satisfying crunch. Brown rice cereal adds a nutty note, if you’re feeling fancy.
    • Salted butter: Enhances sweetness and adds depth. Unsalted works fine if you want full control of salt.
    • Add-ins (chocolate chips, pretzels): Optional chaos makers for texture and flavor bursts. Measure generously for maximum impact.
    • Vanilla extract: A splash brightens everything and cuts through the marshmallow richness.
    • Optional spicy nuts: For a smoky, fiery punch that makes the treats truly monster-worthy.

    Tools of the Crunchy Trade

    • Large saucepan: For melting butter and marshmallows evenly.
    • Rubber spatula: To stir and scrape the mixture without sticking.
    • Greased baking pan: To hold and shape the treats as they set.
    • Parchment paper: Makes removing the set treats easier and cleanup faster.
    • Sharp knife: To cut clean, even squares once cooled.

    The Crunchy, Gooey, and Slightly Unhinged Steps to Monster Rice Krispie Treats

    Step 1: Gather your ingredients and equipment before you start. This keeps the chaos to a minimum.

    Step 2: Melt butter and marshmallows together over low heat until smooth, about 5 minutes. Keep stirring to prevent burning.

    Step 3: Pour in the cereal and stir quickly to coat evenly. Watch for a shiny, oozy texture that clings to each grain.

    Step 4: Press the mixture into a greased pan, using a spatula or parchment paper to smooth the surface.

    Step 5: Allow to cool and set for at least 30 minutes. Don’t rush the hardening phase, or they’ll be crumbly.

    Crisis Averted: Key Checks During Your Krispie Journey

    • The butter and marshmallow mixture should be glossy and smooth, not grainy or clumpy.
    • Cereal should be coated evenly with no dry spots or excess marshmallow pooling.
    • The mixture should be firm enough to hold shape when pressed, but still pliable.
    • The edges of the set treats should be slightly golden, signaling readiness to cut.

    Oops Moments: Common Krispie Mishaps and How to Fix Them

    • The mixture is stiff and crumbly.? Add a splash of hot water or more melted butter to loosen a too-dry mixture.
    • The mixture sticks to your hands or spatula.? Use a dampened spatula to press the mixture down to avoid sticking and messy edges.
    • The mixture smells smoky or looks burnt.? Reduce heat or stir more frequently if marshmallows burn or turn brown.
    • The treats are melting or falling apart when cut.? Chill the pan slightly if treats are too soft to cut cleanly.

    Monster Rice Krispie Treats

    These monster Rice Krispie treats are a playful twist on the classic snack, combining gooey marshmallow binding with crispy rice cereal. They boast crunchy edges, sticky insides, and can be customized with spicy nuts, chocolate, or other add-ins for a rebellious, nostalgic treat. The final texture is irresistibly crisp on the outside and delightfully chewy inside.
    Prep Time 10 minutes
    Cook Time 10 minutes
    Total Time 20 minutes
    Servings: 12
    Course: Main Course
    Cuisine: American
    Calories: 150

    Ingredients
      

    • 4 tablespoons unsalted butter or salted, as preferred
    • 10 cups marshmallows preferably large, mini marshmallows work too
    • 6 cups rice cereal white or brown rice cereal for crunch
    • 1 teaspoon vanilla extract
    • optional add-ins chocolate chips, spicy nuts, pretzels, etc.

    Equipment

    • Large saucepan
    • Rubber spatula
    • Greased baking pan
    • Parchment paper
    • Sharp Knife

    Method
     

    1. Gather all your ingredients and tools. Have your greased pan and parchment paper ready for easy cleanup and shaping.
    2. Melt the butter in a large saucepan over low heat until it’s silky and melted, filling the kitchen with a warm, buttery aroma.
    3. Add the marshmallows to the melted butter and stir constantly, allowing them to melt completely into a glossy, sticky goo that bubbles softly and smells sweet and toasted.
    4. Once the marshmallows are fully melted and smooth, stir in the vanilla extract for a bright, fragrant note.
    5. Pour in the rice cereal all at once and quickly fold it into the marshmallow mixture with your spatula, coating each piece evenly until it turns shiny and sticky, like a glossy mountain of crunch.
    6. If you’re adding extras like chocolate chips or spicy nuts, sprinkle or fold them in now for bursts of flavor and texture.
    7. Transfer the mixture into your prepared pan, using a greased spatula or parchment paper to press it down firmly and evenly, creating a thick, compact layer.
    8. Let the treats cool at room temperature for at least 30 minutes. As they set, they will firm up and develop a satisfying crunch on the edges.
    9. Once cooled and firm, use a sharp knife to cut into even squares or rectangles. The edges should be crisp, with a chewy center that pulls apart satisfyingly.
    10. Enjoy your monster Rice Krispie treats as a fun, nostalgic snack that’s perfect for sharing or enjoying solo—crunchy, chewy, and totally addictive.

    Notes

    Feel free to customize with your favorite add-ins or spices for a personal twist. For extra crunch, press in some crushed pretzels or spicy nuts before cooling.
    These treats are a wild ride of textures—crisp edges, chewy insides, and a caramelized marshmallow aroma that lingers. Feel free to customize with add-ins like chocolate chips or pretzels for extra chaos. Once you master this basic, you might find yourself making them every other day, craving that perfect bite of childhood nostalgia with a rebellious twist.

  • Mummy Brownies: A Nostalgic Twist on Classic Comforts

    Mummy Brownies: A Nostalgic Twist on Classic Comforts

    I’ve always loved the idea of baking with a bit of history—something that feels rooted and personal. These brownies, inspired by old family recipes, carry a whisper of childhood chaos and comfort. They’re not perfect, but that’s part of the charm. Baking them feels like a small act of preserving memories, one spoonful at a time.

    Why I Keep Coming Back to These Brownies

    They remind me of lazy weekends, chaos in the kitchen, and the smell of melting chocolate. Each batch feels like a small victory—imperfect but always satisfying. There’s something about the gooey center and the slightly crisp edges that keeps me chasing that perfect bite. It’s a simple comfort, rooted in memories and made new every time.

    Breaking Down the Ingredients

    • Dark chocolate: Rich, slightly bitter, with a deep cocoa aroma that intensifies as it melts.
    • Unsalted butter: Adds moisture and richness; swap with coconut oil for a dairy-free version.
    • Eggs: Bind the batter; try flax eggs for a vegan tweak.
    • Sugar: Sweetens and creates that fudgy texture; coconut sugar gives a caramel note.
    • Flour: Provides structure; for a gluten-free version, use almond or oat flour.
    • Vanilla extract: Enhances chocolate flavor with a fragrant warmth.
    • Salt: A pinch balances sweetness and heightens flavors.

    Tools & Equipment for Mummy Brownies

    • 20cm square baking pan: The perfect size for even baking and easy slicing.
    • Double boiler: Gentle melting of chocolate and butter to prevent burning.
    • Whisk: To aerate eggs and sugar, creating a lighter batter.
    • Spatula: For folding ingredients and smoothing the batter.
    • Wire rack: Cooling brownies evenly and preventing sogginess.

    The Journey of Preparing Mummy Brownies

    Step 1: Preheat your oven to 180°C (350°F). Grease a 20cm square baking pan and line it with parchment paper.

    Step 2: Melt 200g of dark chocolate and 150g of unsalted butter together in a double boiler until smooth, then set aside to cool slightly.

    Step 3: In a large bowl, whisk together 2 eggs, 150g sugar, and a teaspoon of vanilla extract until pale and fluffy.

    Step 4: Fold the cooled chocolate mixture into the egg mixture, then gently mix in 100g of all-purpose flour and a pinch of salt.

    Step 5: Pour the batter into your prepared pan, smoothing the top with a spatula. Bake for 20-25 minutes until a toothpick inserted in the center comes out with moist crumbs.

    Step 6: Let the brownies cool in the pan for 10 minutes, then transfer to a wire rack to cool completely before slicing.

    Cooking Checkpoints & Tips to Keep in Mind

    • Ensure the chocolate is fully melted and smooth before mixing. It prevents lumps and ensures even flavor.
    • Do not overbake; brownies are best slightly undercooked for that fudgy center.
    • Use high-quality chocolate; it makes a noticeable difference in flavor and texture.
    • Allow the brownies to cool before slicing; this helps them set and prevents crumbling.

    Common Mistakes & How to Fix Them

    • Overbaking leads to dry brownies.? Add a few extra minutes if brownies are not set, but avoid overbaking.
    • Overly dry or crumbly brownies.? Use a toothpick to check doneness—moist crumbs mean perfection.
    • Chocolate seizing or becoming grainy.? Ensure chocolate is not too hot when mixing to keep batter glossy.
    • Cracked or uneven crust.? If brownies crack on top, lower oven temperature slightly and bake a bit longer.

    Old Family-Inspired Brownies

    These brownies are made with rich dark chocolate, butter, eggs, and sugar, baked until their gooey centers and slightly crisp edges create a fudgy, satisfying texture. Inspired by cherished family recipes, they evoke nostalgic chaos and comfort, with a deep cocoa aroma and a moist, dense crumb.
    Prep Time 15 minutes
    Cook Time 25 minutes
    Total Time 40 minutes
    Servings: 9
    Course: Main Course
    Cuisine: American
    Calories: 250

    Ingredients
      

    • 200 g dark chocolate preferably high-quality
    • 150 g unsalted butter can substitute coconut oil for dairy-free
    • 2 large eggs for vegan, try flax eggs
    • 150 g sugar coconut sugar adds caramel flavor
    • 100 g all-purpose flour for gluten-free, use almond or oat flour
    • 1 tsp vanilla extract
    • a pinch salt

    Equipment

    • 20cm square baking pan
    • Double boiler
    • Whisk
    • Spatula
    • Wire rack

    Method
     

    1. Preheat your oven to 180°C (350°F). Grease your 20cm square baking pan and line it with parchment paper for easy removal.
    2. Chop the dark chocolate into small pieces and place it along with the butter into a double boiler. Gently melt, stirring occasionally until smooth and fragrant, then remove from heat and let cool slightly.
    3. In a large bowl, whisk together eggs, sugar, and vanilla extract until the mixture becomes pale, fluffy, and slightly thickened, about 2-3 minutes. You’ll notice it’s light in color and has a gentle sheen.
    4. Pour the slightly cooled melted chocolate mixture into the egg mixture. Gently fold together with a spatula until well combined and glossy.
    5. Sift in the flour and add a pinch of salt to the batter. Carefully fold until just combined, making sure no dry streaks remain and the batter is smooth but not overmixed.
    6. Pour the batter into your prepared pan, spreading it evenly with a spatula. Tap the pan gently on the counter to release any air bubbles and level the surface.
    7. Bake in the oven for 20-25 minutes. The edges should be set and slightly pull away from the sides, while the center remains moist and gooey. Insert a toothpick—moist crumbs are perfect.
    8. Remove the pan from the oven and let the brownies cool in the pan for about 10 minutes. Then transfer to a wire rack and cool completely before slicing to prevent crumbling.
    9. Slice into squares and serve once cooled. Enjoy the rich, fudgy texture with its deep cocoa aroma and slightly crisp edges, perfect for nostalgic moments.
    These brownies are a bit of a throwback, bringing back childhood afternoons filled with gooey chocolate and the faint smell of baked nostalgia. Their richness and slightly chewy texture make them perfect for sharing—or not. Feel free to add a pinch of cinnamon or a sprinkle of sea salt on top for your own twist. Whatever you do, enjoy every bite, knowing this simple recipe carries a dash of your own history.

  • Spooky Cupcakes: A Haunted Twist on a Classic Treat

    Spooky Cupcakes: A Haunted Twist on a Classic Treat

    Baking spooky cupcakes is a surprisingly satisfying way to blend childhood nostalgia with a touch of seasonal mischief. I love how the smell of cocoa and vanilla fills the kitchen, hinting at something delicious and just a little eerie. It’s a messy, colorful process that turns into a fun, slightly chaotic project for any occasion that calls for a little creepiness.

    Why These Spooky Cupcakes Haunt My Kitchen

    They remind me of childhood Halloweens, the chaos and joy wrapped into one. Each batch feels like a tiny celebration, a chance to get a little messy and create something that makes people smile or shiver. Plus, the dark, rich flavors somehow make the season more alive, more intense. I keep coming back to these because they’re imperfect, fun, and perfectly suited for a little festive chaos.

    Ingredients That Bring the Spook

    • Flour: The backbone of your cupcake, choose a good-quality all-purpose for a tender crumb.
    • Cocoa powder: Gives that deep, smoky flavor—preferably Dutch-processed for richness.
    • Butter: Creamy and rich, it creates a moist crumb—use unsalted for control.
    • Food coloring: Black or dark purple for that eerie look—start with a few drops, add more for intensity.
    • Decorative toppings: Candy eyes, sprinkles, edible webs—think creepy but fun, add as you like.
    • Vanilla extract: A splash lifts all flavors, making everything taste a little brighter.
    • Buttermilk: Adds moisture and tang—sub with sour cream if you’re out.

    Tools of the Haunted Trade

    • Mixing bowls: Combine ingredients smoothly and without fuss.
    • Electric mixer: Beat butter and sugar to airy perfection.
    • Muffin tin: Shape the cupcakes, ensuring even baking.
    • Cooling rack: Stop the cupcakes from sogging as they cool.
    • Decorating spatula: Spread frosting evenly and artistically.

    Crafting the Perfect Spooky Cupcakes

    Step 1: Preheat your oven to 175°C (350°F).

    Step 2: Line a muffin tin with paper cupcake liners.

    Step 3: Mix the dry ingredients: flour, cocoa powder, baking powder, salt.

    Step 4: In a separate bowl, beat the butter and sugar until light and fluffy.

    Step 5: Add eggs one at a time, then stir in vanilla.

    Step 6: Alternate adding buttermilk and dry ingredients, starting and ending with dry.

    Step 7: Fill cupcake liners about 2/3 full with batter.

    Step 8: Bake for 18-20 minutes, until a toothpick comes out clean.

    Step 9: Let cupcakes cool in the tin for 5 minutes, then transfer to a wire rack.

    Step 10: Prepare spooky frosting by mixing butter, powdered sugar, and black food coloring.

    Step 11: Frost cooled cupcakes generously, then add creepy decorations like candy eyes or edible spider webs.

    Key Moments to Watch During Your Spooky Cupcake Journey

    • The batter should be smooth and slightly glossy before filling the liners.
    • Cupcakes should rise evenly and not spill over the edges.
    • Frosting should be fluffy and easy to spread, not runny or stiff.
    • Decorations should stick well without melting or sliding off.

    Haunted Baking Blunders & How to Fix Them

    • Overbaking or oven too hot.? If cupcakes crack on top, lower oven temperature by 10°C (20°F).
    • Too much liquid or overmixing.? If frosting is runny, chill it for 10 minutes before decorating.
    • Poor adhesion or humid environment.? If decorations slide off, set them with a tiny dab of frosting.
    • Overworking the batter or too much flour.? If cupcakes are dense, don’t overmix the batter.

    Spooky Halloween Cupcakes

    These spooky cupcakes are baked with a moist cocoa-infused crumb, topped with dark, fluffy frosting, and decorated with creepy candies and edible webs. They combine rich flavors with colorful, eerie decorations, making them a fun and festive treat for Halloween or any spooky celebration. The process involves mixing, baking, and decorating to create a delightfully chaotic and charming dessert.
    Prep Time 30 minutes
    Cook Time 20 minutes
    Total Time 50 minutes
    Servings: 12
    Course: Main Course
    Cuisine: Halloween
    Calories: 250

    Ingredients
      

    • 1 1/2 cups all-purpose flour good quality for tender crumb
    • 1/2 cup Dutch-processed cocoa powder for deep chocolate flavor
    • 1 1/2 teaspoons baking powder
    • 1/2 teaspoon salt
    • 1/2 cup unsalted butter softened
    • 1 cup granulated sugar
    • 2 large eggs
    • 1 1/2 teaspoons vanilla extract
    • 3/4 cup buttermilk or sour cream
    • Black or dark purple food coloring food coloring for eerie look
    • 1 cup unsalted butter for frosting, softened
    • 3-4 cups powdered sugar for frosting
    • Creepy decorations candy eyes, sprinkles, edible webs as desired

    Equipment

    • Mixing bowls
    • Electric mixer
    • Muffin tin
    • Cupcake liners
    • Cooling rack
    • Decorating spatula

    Method
     

    1. Preheat your oven to 175°C (350°F) and line a muffin tin with cupcake liners. In a large bowl, sift together the flour, cocoa powder, baking powder, and salt until evenly combined.
    2. In a separate bowl, beat the softened butter and sugar with an electric mixer on medium speed until the mixture is light, fluffy, and fragrant, about 3-4 minutes. Add the eggs one at a time, beating well after each addition, then stir in the vanilla extract.
    3. Gradually add the dry ingredients to the wet mixture, alternating with buttermilk. Start and finish with the dry ingredients, mixing just until combined after each addition. The batter should be smooth, shiny, and slightly thick.
    4. Divide the batter evenly among the cupcake liners, filling each about two-thirds full. Add a few drops of food coloring to the batter and gently swirl to create a spooky, marbled effect if desired.
    5. Bake the cupcakes for 18-20 minutes, or until a toothpick inserted into the center comes out clean. While baking, you’ll smell the rich cocoa aroma filling your kitchen.
    6. Remove the cupcakes from the oven and allow them to cool in the tin for about 5 minutes. Then, transfer them to a cooling rack and let them cool completely before decorating.
    7. For the frosting, beat the softened butter with an electric mixer until creamy and pale, about 2 minutes. Gradually add the powdered sugar, mixing on low speed, then increase to high until the frosting is fluffy and spreadable. Mix in the food coloring until the frosting is a dark, spooky hue.
    8. Generously spread the dark frosting on each cooled cupcake using a spatula or decorating tool, creating a slightly messy, eerie look. Decorate with creepy toppings like candy eyes, sprinkles, or edible webs to complete the haunted effect.
    9. Once decorated, arrange the cupcakes on a serving platter. Serve immediately or store in an airtight container for up to two days to keep them fresh and spooky.

    Notes

    For extra creepiness, add edible googly eyes and create spider webs with edible webbing. Be creative with decorations to make each cupcake uniquely spooky!
    These cupcakes aren’t just for Halloween—they carry a certain nostalgic charm that makes them fun any time of year. The rich cocoa flavor with a hint of vanilla keeps everyone coming back for more, even after the decorations come off. Don’t be afraid to get creative with your spooky toppings—sometimes the best part is seeing those goofy, ghoulish faces staring back at you. Enjoy baking these with a little chaos and a lot of joy.